


Starting Sun WorkShop |
2 |
 |
This chapter is organized into the following sections:
Opening WorkShop
Once you have installed WorkShop and added it to your command path, you can open it by typing workshop at a command prompt.
Selecting and Using Text Editors
Unless you have previously set your EDITOR environment variable to GNU Emacs or XEmacs, WorkShop uses the vi editor (For information on how to set your EDITOR environment variable, see the manual page for your command shell). To use the integrated GNU Emacs or XEmacs editors, you must use the Editor Options dialog box. The editor you choose will remain the default editor for subsequent sessions of WorkShop. To change editors, choose Options  Text Editor Options from the WorkShop main window to open the Editor Options dialog box and choose a new default editor.
Getting Started with WorkSets and Menu Picklists
WorkSets and menu picklists help you keep track of the files and objects you use for your development projects. WorkShop uses WorkSets and menu picklists to provide quick access the various directories and files associated with a given development project, including:
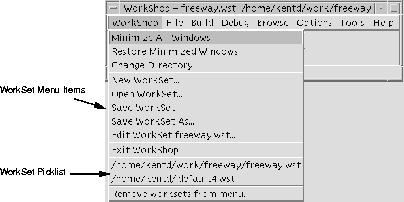
WorkShop uses WorkSets to save complete sets of menu picklists. Whenever you start WorkShop, it either creates a default WorkSet (usually .default.wst) or it opens the last WorkSet you had open. By default, when you close WorkShop, it automatically saves your current WorkSet. Consequently, to use WorkShop WorkSets, you do not have to do anything. The WorkShop does it for you.
If you want to create new WorkSets of your own, you can do so using the New WorkSet item in the main WorkShop menu. By saving a WorkSet you can save all the picklists objects associated with a given development project under a single name. Saving your objects and files as a WorkSet makes them easier to access later.
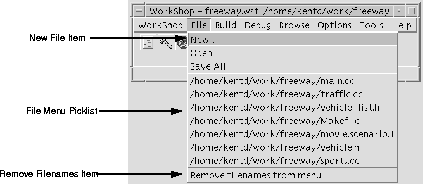
By default, the files, build target, and program you created are added to the appropriate menu picklist. In this case, the source files are placed on the File menu picklist; the build target is placed on the Build Menu picklist; and, the program is placed on the Debug Menu picklist. To save all of these as a WorkSet, select WorkShop
Save WorkSet As, and then enter a name in the chooser. The WorkShop stores the files, target and program under the name you choose. Loading this WorkSet later reloads the files, target, and program connected to the appropriate menu picklistIf you want to start the WorkShop with a specific WorkSet loaded, you can. To do so, specify the workset name on the command line at startup. For example, the command:
workshop freeway.wststarts WorkShop with the all the files, targets, programs, and so on associated with the freeway WorkSet loaded on the appropriate menu picklist.
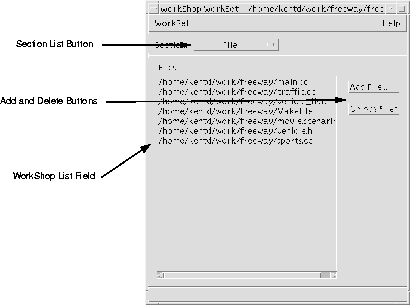
Picklist objects (for example, Files on the File menu) can be added to or removed from menu picklists (and therefore to the current WorkSet) either by editing the WorkSet directly, or by adding or removing an object directly from any of the WorkShop menus.
Edit WorkSet WorkSet_Name. When the WorkShop WorkSet window appears, use it to add or delete the desired object.
For more information about creating, editing, or modifying WorkSets, see "Using WorkSets" in the WorkShop online help.
 .
.