


Cross Platform Development |
10 |
 |
Note - This chapter is only relevant if you have purchased the WorkShop Visual XP add-on package. This package allows you to create interfaces which are common to both Motif and Windows environments.
10.2 Overview
The best way to develop an application which is to be ported to different platforms is to encapsulate the platform specific parts in some way so that the body of the application is isolated from the implementation details. WorkShop Visual uses its C++ code structuring capabilities to generate a set of classes for the user interface that have the same public interface, but two different implementations. In WorkShop Visual these implementations are known as flavors. There are three flavors of C++ code that can be generated:
The issues of compliance and importing old designs are covered in later sections of this chapter.
If the variable name field of the selected widget is pink, this indicates that the widget will not map to any equivalent Microsoft Windows object. For instance, in Microsoft Windows a menubar is simply an attribute of a Dialog, there is no menubar object. Consequently WorkShop Visual will show the variable name pink for menubar widgets.
10.3 Starting in Microsoft Windows Mode
There are three methods of invoking WorkShop Visual so that it is running in Microsoft Windows mode. Select the method which suits you best, bearing in mind that you may have to share your copy of WorkShop Visual with other users who do not want to run WorkShop Visual in Microsoft Windows mode. 10.3.1 The Resource File
Microsoft Windows mode can be specified by a resource in the file containing your WorkShop Visual application resources: visu.windows: true
10.3.2 The Command Line Switch
Microsoft Windows mode can also be specified by a command line switch when invoking WorkShop Visual: visu -windows
10.3.3 Separate Version of WorkShop Visual
The third method of invoking WorkShop Visual in Microsoft Windows mode gives the appearance of a separate application which is always in Microsoft Windows mode. This method uses the application resource, described above.
Note - This is the technique that WorkShop Visual uses to bring up the version for smaller screens - such as the VGA screen. The program small_visu is nothing more than a hard link to the WorkShop Visual binary which picks up an alternative set of resources from the WorkShop Visual resource file.
10.4.1 Microsoft Windows Compliant Toggles
There are two Microsoft Windows Compliant toggles - one on the toolbar and one in the Module menu. They both have the same function.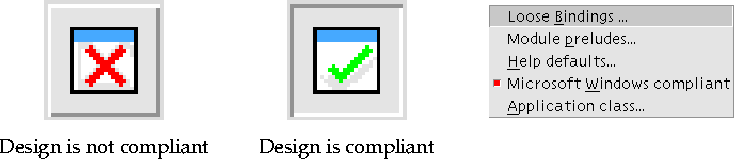
Figure 10-1 The Compliance Buttons in the Toolbar (left)
and the Module Menu (right)
10.4.2 The Flavor Menu
The flavor menu in the toolbar specifies which flavor of code you wish to generate: plain Motif, Motif XP or Microsoft Windows. This only applies to C++ code generation.
Figure 10-2 The Flavor Menu in the Toolbar
10.5 Microsoft Windows Compliance
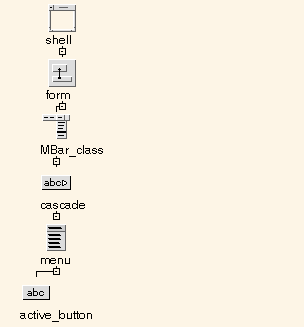
This section details the restrictions imposed by WorkShop Visual which ensure that Microsoft Windows compliant code can be generated. When in Microsoft Windows mode WorkShop Visual will not allow you to create a design which violates these restrictions. 10.5.1 Structure restrictions
Because of the differences between Motif and Microsoft Windows in the way events are handled, some widgets cannot be made classes. In Microsoft Windows, events concerning certain widgets are always sent to the enclosing class. Other widgets must be classes in order to handle Microsoft Windows messages. Here is a list of these restrictions:

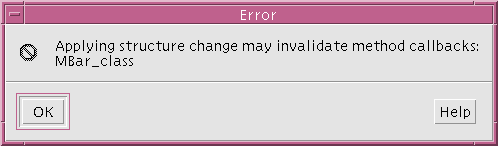
Although WorkShop Visual assists you in the above way, changing whether a widget is a class or not could have a major impact on your application. You will need to reconsider the structure of your application very carefully.
The second child of a Frame must be a Label widget - this is the title of the Frame. The Frame control in Microsoft Windows (actually a CButton in disguise) simply has a title attribute. There is no way to use another control as the title. The first child can be any widget.
For the same reason it is not possible to have a CascadeButton in a definition which has no Pulldown menu and to then add the Pulldown in an instance.
Slightly more subtly, it is not possible to have a widget with methods added to an instance which is not being sub-classed. For example, imagine you have an instance of a RowColumn definition, and the root widget (i.e. the RowColumn) does not have its structure set to class. When not in Microsoft Windows mode it is possible to add a button to the RowColumn instance and give it a method callback which is declared in an enclosing scope (say a Shell class). This is not possible in Microsoft Windows; the event has to be handled by the enclosing control (in this case the CWnd which represents the RowColumn).
.
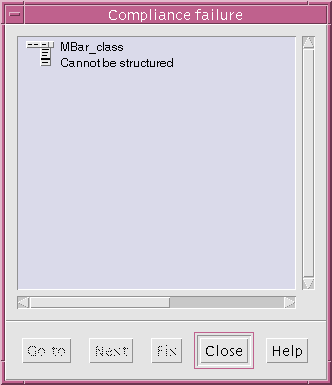
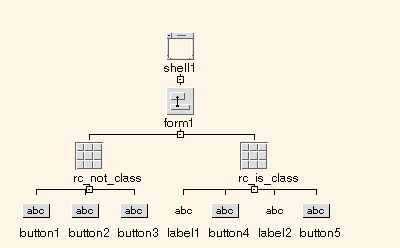
Figure 10-7 RowColumn Defined as Class
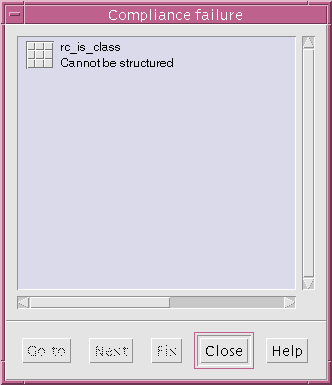
Figure 10-8 Error When Pasting a Class as Child of Shell
10.7 User-Defined Widgets
WorkShop Visual can be extended to support widgets from any other Xt toolkit in addition to the default Motif set. Widgets added to WorkShop Visual are called user-defined widgets. Chapter 14, "User-Defined Widgets" provides a detailed description of this topic. The new widgets appear in the WorkShop Visual widget palette and can be used in the same way as the pre-defined Motif ones.
WorkShop Visual will, however, still generate the call to the Create method in the Microsoft Windows code as if the control were a CButton. Although you cannot change this, it should not cause a problem.
10.8 Using Links
In the Motif flavors links are pre-defined callbacks. In the Microsoft Windows flavor they are implemented as simple global functions which are called by a button's message handler. There are, however, some restrictions on how links can be used on Microsoft Windows. These restrictions only affect whether code is generated for a link, they do not affect the design's compliance. 10.8.1 Destination Widget Not an Object on Microsoft Windows
If the widget selected as the destination of a link is not mapped to an object on Microsoft Windows, the Add button in the Edit Links dialog is pink. The link can still be added and will be effective on Motif but it will not be generated into the Microsoft Windows code. To indicate this, the widget in the list of links is pink. See the Mapping Motif Widgets to Microsoft Windows section on page 695 for more information on which widgets are mapped to Microsoft Windows objects.
10.8.2 Buttons in Menus as Link Destinations
When adding a link where the destination widget is a PushButton in a Menu, the type of link is restricted to enable and disable. You cannot show, hide, manage or unmanage a Menu Button on Microsoft Windows. 10.8.3 File Selection Dialog as Link Destination
FileSelectionBox is implemented on Microsoft Windows as a CFileDialog, a modal dialog which is shown by calling the DoModal method. This method does not return until the FileSelection is complete or cancelled. On Microsoft Windows, therefore, only the show link is supported. For both MFC and Motif XP flavors the code is structured so that the DoModal method does not return until the selection is complete or cancelled.
10.9 Manager Widgets and Layout
The Motif manager widgets have no equivalents on Microsoft Windows. Widgets such as Forms and RowColumns do not exist on Microsoft Windows and therefore are not generated at all if they are not made a class. 10.9.1 Fonts
Because WorkShop Visual is generating an absolute size for a Microsoft Windows control, it is important that the size of a dialog is appropriate for any font that will be used for text displayed in it. The best way to ensure this is to make WorkShop Visual use a similarly sized font to display the dialog whilst it is being designed. There are two ways to do this.visu*dialog.labelFontList:\
-adobe-helvetica-medium-r-normal-*-14-*-*-*-*-77-iso8859-1
visu*dialog.buttonFontList:\

-adobe-helvetica-medium-r-normal-*-14-*-*-*-*-77-iso8859-1
visu*dialog.textFontList:\
These values may work well for you, but it will depend on the precise font used on your Microsoft Windows system. It is the size and average width values which are important.
-adobe-helvetica-medium-r-normal-*-14-*-*-*-*-77-iso8859-1
10.9.2 Resize Behavior
In Microsoft Windows mode, WorkShop Visual generates OnSize message handlers to provide some resize behavior when the user resizes a dialog. WorkShop Visual does not attempt to reproduce exactly the Motif geometry management, rather it generates a handler which will simulate the resize behavior of certain manager widgets. In particular, these are:
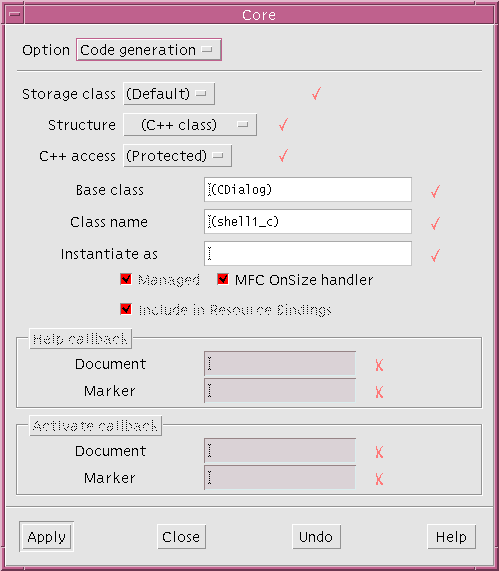
Figure 10-9 The Core Resources Dialog - Code Generation Page
10.10 Fonts
In order for a font to be generated into the Microsoft Windows code you must use font objects. This is because fonts must be persistent on Microsoft Windows. Only by using font objects can you guarantee this. WorkShop Visual provides a visual cue by making the Apply button pink if you select an item from the list of fonts in the font selection dialog. If, however, you select an item from the list of font objects, the Apply button is no longer pink. 10.10.1 Fontlists and Compound Strings
If you specify fontlists for your objects in WorkShop Visual, the first font in the list will be used for the object on Microsoft Windows. Compound strings containing a mixture of tags will be translated to Microsoft Windows using only the first font specified. 10.10.2 Font naming
Fonts in Microsoft Windows are named using a different mechanism from that used by X Windows. However, Microsoft Windows has quite a sophisticated matching algorithm. So, although WorkShop Visual uses a fairly crude mapping to translate the font specification, even if you specify a font which is not available in Microsoft Windows, it will probably be substituted with something that looks reasonable.
10.11 Pixmaps, Bitmaps and Icons
Pixmap objects created in WorkShop Visual are converted into a Microsoft Windows bitmap or icon (depending on whether the object is a button or label respectively). This is done for you automatically when you generate a Microsoft Windows resource file. X monochrome bitmaps are not supported in the translation to Microsoft Windows. 10.11.1 Buttons with Pixmaps
For a Motif Button with a pixmap type label, WorkShop Visual generates a CBitmapButton for Microsoft Windows. One difference between buttons with pixmaps on Motif and CBitmapButtons on Microsoft Windows is that CBitmapButtons have no border - in fact they do not look like buttons at all. You may, therefore, wish to incorporate a border in your pixmap design.
10.12 Colors
You can set the Background and Foreground color of a widget which will be mapped to an object on Microsoft Windows. These colors will be generated into the Microsoft Windows code in terms of their RGB (Red, Green, Blue) values. Microsoft Windows does not normally have the richness of color that is commonly available on X/Motif. For this reason the colors may not look identical on the two platforms. 10.12.1 Color Objects
Specify the Background and Foreground colors in the usual way in WorkShop Visual. Background colors must be color objects - Foreground colors do not have to be.
10.13 Configuring WorkShop Visual
There are a number of application resources which apply to WorkShop Visual in Microsoft Windows mode. One of these is the windows flag, indicating that WorkShop Visual should start up in Microsoft Windows mode. This is described in the Starting in Microsoft Windows Mode section on page 334.
10.13.1 Adding Ctrl-M to Generated Lines
By default, WorkShop Visual generates code for Microsoft Windows which adds Ctrl-M as the carriage return before the linefeed character. This character is expected by MS-DOS and may, therefore, be expected by your file transfer program. If, however, you do not wish to have these characters at the end of each line, make the following change to the WorkShop Visual resource file:visu.mfcCarriageReturn: false
10.13.2 Setting the Color of non Microsoft Windows Resource Fields
By default, WorkShop Visual indicates that a field in a resource panel, or a button or any other text field, is not applicable to Microsoft Windows by coloring it pink. This color can be changed by altering the following line in the WorkShop Visual application resource file:visu.mfcTextWarningBackground: #ecc9c9eacdda
The example above shows the default file entry - i.e. the color pink. You can change this large number to a more readable color name. 10.13.3 Setting the Filename Filter
In the Generate dialog, WorkShop Visual provides a default filename filter in the Filter text field. You can change this in the application resource file. Search for the following:visu.c++Filter: *.c
visu.c++StubsFilter: *.c
These are the default entries for Motif code generation - both vanilla Motif and Motif XP. For Microsoft Windows code generation there are two extra filename filters:visu.visualC++Filter: *.cpp
visu.visualC++StubsFilter: *.cpp
If you wish to share code between the two platforms, you might consider changing the filename filters for the two different flavors so that they are the same. See the following section on file names for more details about points to bear in mind when naming files intended for both platforms.
10.14 File names
Filenames on the PC are restricted to 12 characters in total (including the dot) which must be distributed as no more than eight before the dot and no more than three after. If you wish to share files between the two platforms, this restriction will have to be kept in mind when generating Microsoft Windows code. Remember, also, that MS-DOS and Microsoft Windows are not case sensitive. Do not rely on upper and lower case letters to distinguish filenames. 10.14.1 Pixmaps
The above restrictions should also be remembered when naming pixmap objects. When you ask WorkShop Visual to generate a Microsoft Windows resource file after you have created pixmaps, WorkShop Visual automatically generates Microsoft Windows bitmaps and icons in separate files using the name you specified in the pixmap editor. If, therefore, you have specified a name with more than eight characters, you will encounter problems on Microsoft Windows. 10.14.2 C++ Code
Different compilers have varied conventions acceptable on filename extensions. The suffix `.cxx' seems to be universally supported; most compilers should support `.cpp'; some compilation systems may accept `.C' and `.c++'. Visual C++ will complain if you specify `.c' for a file which contains C++ code.
10.14.3 Makefile
No makefile can be generated for the Microsoft Windows code files. Since make is a UNIX utility, it is assumed that you will be using a Microsoft Windows development environment (such as Visual C++) to build your application.
Note - If you are using Make on your UNIX platform, it is best to generate different code flavors into separate directories in order to avoid confusion and name clashes.
10.15 Method Declarations
The Method Declarations dialog has an extra feature when in Microsoft Windows mode. There is a toggle button labelled Microsoft Windows MFC.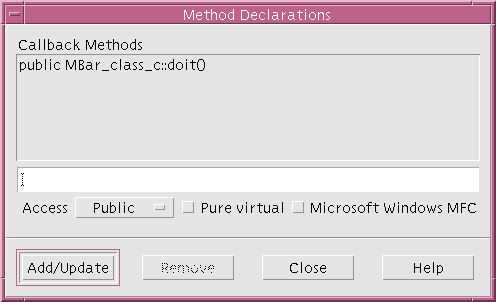
Figure 10-10 Method Declarations Dialog with Microsoft Windows MFC Toggle
10.16 DrawingAreas
If a DrawingArea is not the child of a ScrolledWindow, MainWindow or Shell it is created as a basic CWnd class - otherwise it is ignored for Microsoft Windows code generation. See the Mapping Motif Widgets to Microsoft Windows section on page 695 for more information.
10.16.1 Adding Drawing Callbacks for Microsoft Windows
The Motif XP class library does not include any drawing support; any you require will be platform specific. However, WorkShop Visual does allow you to add callback methods which by default are only declared for Motif flavors and Microsoft Windows message handlers. When in Microsoft Windows mode WorkShop Visual adds a set of additional toggle buttons to the DrawingArea resource panel which can be used to add a Microsoft Windows message handler in the generated code.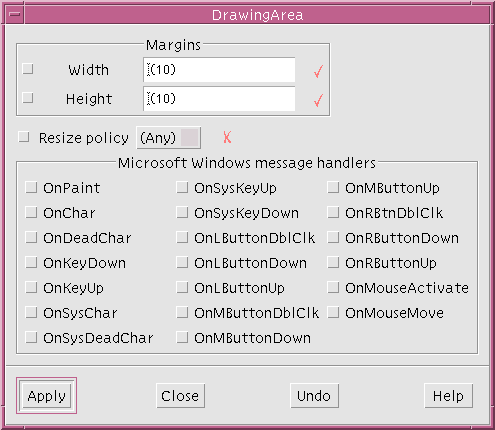
Figure 10-11 The DrawingArea Resource Panel
10.16.2 The Microsoft Windows Message Handler for DrawingArea
If, for example, you were to select the OnRButtonDown toggle in the panel pictured above, the following stub is added to your callback stubs file:afx_msg void scrolled_win_c::OnRButtonDown( UINT nFlags, CPoint
point )
{
}
Note that afx_msg is a pseudo keyword on Microsoft Windows. The following lines are added to your C++ externs file://{{AFX_MSG(scrolled_win_c)
afx_msg void OnRButtonDown( UINT nFlags, CPoint point ):
//}}AFX_MSG
DECLARE_MESSAGE_MAP ()
This registers the message handler with Microsoft Windows.
10.17 Application Class
WorkShop Visual generates an instance of a CWinApp class to the MFC C++ flavors to represent the application. You can configure this class by means of the Application Class dialog which is displayed from the Module Menu. Figure 10-12 shows the dialog.
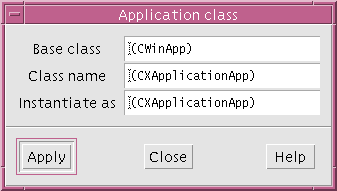
Figure 10-12 The Application Class Dialog
Note - The declaration of the application class (whether defined by yourself or using WorkShop Visual's default) is only generated when you are generating a main procedure - the "Main Program" in the Generate dialog.
10.18 Code Generation
There are three points which should be taken into consideration when generating code. 10.18.1 Synchronizing Save and Code Files
WorkShop Visual has to store the widget id numbers in the save file for definitions so that code can be correctly generated for instances which indirectly modify the layout of an unnamed component. This can cause a problem if the design is changed in a way which affects the widget ids (such as resetting) before the code is generated. WorkShop Visual will detect such loss of synchronization and will prompt you to save the file. 10.18.2 Dialog Flashing
In order for WorkShop Visual to correctly generate layout information the dialogs need to be realized. WorkShop Visual will automatically show and then hide any unrealized dialogs when Microsoft Windows code is generated. You may see the dialogs appear briefly on the display. 10.18.3 Use of Japanese Font
Any Microsoft Foundation Class (MFC) code generated by WorkShop Visual which contains Japanese text needs to be post-processed before it is compiled under Microsoft Windows.visutosj [-xf*] [file]
The arguments are: