


C++ Code Tutorial |
9 |
 |
This chapter is a tutorial. It contains step-by-step instructions that show you how to:
Further information on the subject of structured code generation can be found in Chapter 8, "Structured Code Generation and Reusable Definitions".
9.2 Creating a C++ Class
A C++ class in WorkShop Visual corresponds to any widget with its children. When you designate a widget as a C++ class, WorkShop Visual generates a class with that widget and its named descendant widgets as data members. This class can be extended by adding data members and member functions and thus provides a single location for properties that relate to the whole hierarchy. 9.2.1 Designating a C++ Class
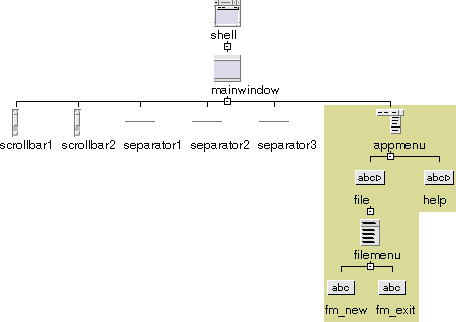
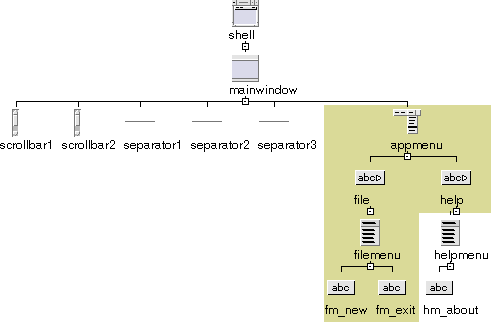
Use the following steps to create a widget hierarchy containing a MenuBar widget and designate the MenuBar as a C++ class. Note that this example would not be compatible with Microsoft Windows code generation.
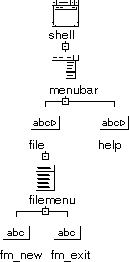
This completes the example hierarchy. Now designate the menu bar as a C++ class:
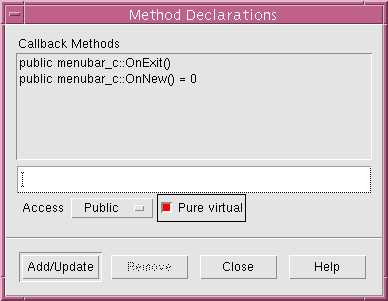
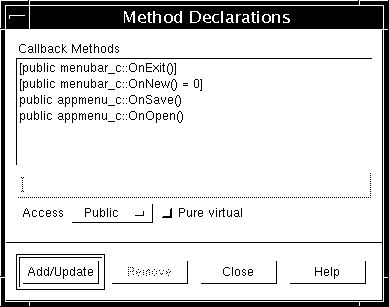
This is shown in Figure 9-3.
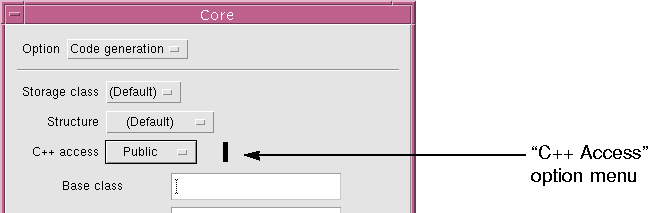
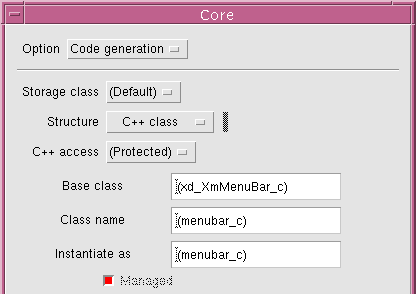
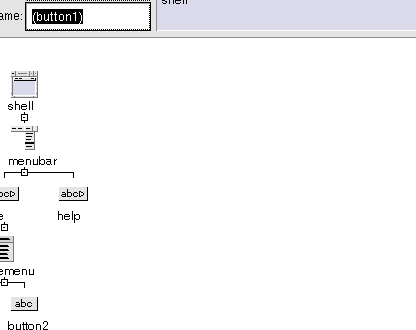
Figure 9-3 Member Access Control
"Generate" toggle.

...
class menubar_c: public xd_XmMenuBar_c {
public:
virtual void create (Widget parent, char *widget_name = NULL);
Widget help;
protected:
Widget menubar;
Widget file;
Widget filemenu;
Widget fm_new;
Widget fm_exit;
};
typedef menubar_c *menubar_p;
...The new class for this MenuBar is based on an existing class, xd_XmMenuBar_c. The MenuBar and its named widget descendants are protected members, except for the widget help, which you designated as public.
The primary C++ file, menubar.cpp, contains the creation function for the new class. This function creates the MenuBar widget and its descendants. Note that this is not done in the constructor for menubar_c. This gives you the option of creating the widgets later than the class instantiation.
...
#include "menubar.h"
...
void menubar_c::create (Widget parent, char *widget_name)
{
Widget children[2]; /* Children to manage */
Arg al[64]; /* Arg List */
register int ac = 0; /* Arg Count */
XmString xmstrings[16]; /* temporary storage for XmStrings */
if ( !widget_name )
widget_name = "menubar";
menubar = XmCreateMenuBar ( parent, widget_name, al, ac );
_xd_rootwidget = menubar;
xmstrings[0] = XmStringCreateLtoR("File",
(XmStringCharSet)XmFONTLIST_DEFAULT_TAG);
XtSetArg(al[ac], XmNlabelString, xmstrings[0]); ac++;
file = XmCreateCascadeButton ( menubar, "file", al, ac );
ac = 0;
...
children[ac++] = file;
children[ac++] = help;
XtManageChildren(children, ac);
ac = 0;
}The menubar.cpp file also includes a creation function for the complete hierarchy. This function creates any widgets not in the class: in this case, just the Shell. It then creates an instance of the menubar_c class and calls menubar_c::create() to create the widget members of the class:
void create_shell (Display *display, char *app_name, int
app_argc, char **app_argv)
{
Widget children[1]; /* Children to manage */
Arg al[64]; /* Arg List */
register int ac = 0; /* Arg Count */
XtSetArg(al[ac], XmNallowShellResize, TRUE); ac++;
XtSetArg(al[ac], XmNtitle, "Demo"); ac++;
XtSetArg(al[ac], XmNargc, app_argc); ac++;
XtSetArg(al[ac], XmNargv, app_argv); ac++;
	shell = XtAppCreateShell ( app_name, "XApplication",
applicationShellWidgetClass, display, al, ac );
ac = 0;
menubar = new menubar_c;
menubar->create ( shell, "menubar" );
XtManageChild ( menubar->xd_rootwidget());
}
The C++ code generated by WorkShop Visual is straightforward to build. The only special feature is that the base classes from which the generated classes are derived, such as xd_XmMenuBar_c, must be available. The $VISUROOT/src/xdclass/lib directory contains source for the default base classes. $VISUROOT/src/xdclass/h contains header files.
If the libxdclass.a library has not yet been built, use the following steps to build it using the supplied Makefile:
When this completes, the libxdclass.a library is ready to use.
You are now ready to build the program using the generated Makefile.
The application looks and behaves exactly as it would if there were no classes in it.
Note - Because the generated Makefile contains references to $VISUROOT, you must set this environment variable before building the program.
Note - This section, and the following three sections, are specific to C++ programming. When using C structures the conventional callback mechanism applies. If you are not doing C++ programming you might like to skip to the Creating a Definition section on page 313.
9.3.2 Specifying a Callback Method
The callbacks dialog lets you specify the member functions that are invoked in response to events. When you specify a callback method for a particular widget, the method which is invoked is that which belongs to the most immediate class-designated ancestor of the widget (perhaps the widget itself). For example, callback methods on the menu buttons in the MenuBar example invoke member functions of the menubar_c class.

Use a similar procedure to enter a callback method on the fm_exit button:
class menubar_c: public xd_XmMenuBar_c {
public:
...
static void OnExit( Widget, XtPointer, XtPointer );
virtual void OnExit( Widget, XtPointer );
static void OnNew( Widget, XtPointer, XtPointer );
virtual void OnNew( Widget, XtPointer );
};Note that only the static versions of these functions have the argument list expected by an Xt callback. Therefore, when Xt invokes the callback method menubar_c::OnNew(), the C++ compiler selects the static version based on the argument list.
Note the following line in the creation function in menubar.cpp:
XtAddCallback (fm_new, XmNactivateCallback, OnNew, (XtPointer)
this);
The code for the static function is also generated into menubar.cpp. This function simply invokes the non-static virtual member OnNew(Widget, XtPointer), using the instance pointer passed in as client data:
void menubar_c::OnNew( Widget widget, XtPointer client_data,
XtPointer call_data )
{
menubar_p instance = (menubar_p) client_data;
instance->OnNew ( widget, call_data );
}You provide the code for the non-static virtual member function OnNew(Widget, XtPointer). A stub for this function is generated to menubarS.cpp:
void
menubar_c::OnNew (Widget w, XtPointer xt_call_data )
{
	XmAnyCallbackStruct *call_data = (XmAnyCallbackStruct *)
xt_call_data;
}WorkShop Visual generates code according to this pattern for all the callback methods that are used in a hierarchy. In this example, similar code is generated for OnExit().
OnNew() and OnExit() are invoked from the fm_new and fm_exit PushButtons but the functions are methods of the menubar_c class. This means that all the callback functions that define the behavior of widgets in the class are kept in one place. It also means that all callback functions have access to the instance data for the class and can use it to share information.
void
menubar_c::OnExit (Widget, XtPointer)
{
exit(0);
}
The C++ compiler produces an error message like:
"menubar.cpp" line 100: Error: Cannot create a variable for
abstract class menubar_c
The error occurs because the menubar_c class contains a pure virtual function and therefore cannot be instantiated. It is now only useful as a base class. Later in this chapter you will use this class as a basis for a derived class.
Note - This section is specific to C++ programming.
For this example, we shall add the prelude in the Preludes dialog before generating the code.
Note - It is possible to type preludes directly into the generated code using WorkShop Visual's edit mechanism. See the Customizing the Generated Files: Preludes section on page 254 for details on doing this.

By default, WorkShop Visual derives the name of a C++ class from the variable name of the root widget and so the class for the widget menubar is menubar_c:
Note - This section is specific to C++ programming.
class menubar_c: public xd_XmMenuBar_c {
...
};When WorkShop Visual generates code to create an instance of the class, it uses the same name:
menubar = new menubar_c;You can change the default behavior so that WorkShop Visual declares the generated class under one name and creates the instance under another, for example:
menubar = new mymenubar_c;To make this change, use the "Instantiate as" field on the Code Generation page of the Core resource panel:
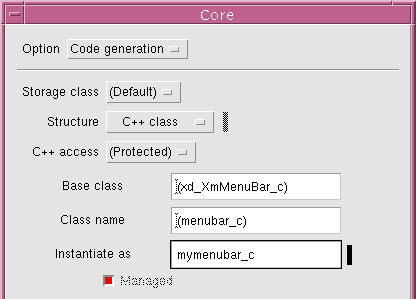
menubar = new mymenubar_c;
Use the following code:
#ifndef _mymenubar_h
#define _mymenubar_h
#include <menubar.h>
class mymenubar_c: public menubar_c {
public:
// Constructor
mymenubar_c();
//Provide implementation for inherited pure virtual
void OnNew(Widget, XtPointer);
};
#endifBecause the new class is derived from menubar_c, it inherits all widget members and member functions you declared for that class in WorkShop Visual. You can add any number of new members. Here we add a constructor function and an implementation of the OnNew() virtual callback method.
Use the following code:
#include <mymenubar.h>
mymenubar_c::mymenubar_c()
{
modified = TRUE;
}
void
mymenubar_c::OnNew(Widget, XtPointer)
{
// Reset modified flag
if (modified)
modified = FALSE;
}This completes all the code for the class. Note that the generated C++ code module mymenubar.cpp needs to include the header file for the derived class mymenubar_c. This is done using the "Include Header File" in the Generate dialog.
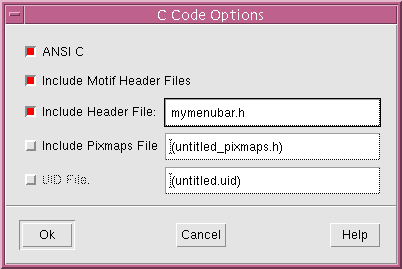
Figure 9-10 Changing the Declarations Header
XD_CC_SOURCES=\
mymenubar.cpp
XD_CC_OBJECTS=\
mymenubar.o
mymenubar.o:mymenubar.cpp
$(CCC) $(CCFLAGS) $(CPPFLAGS) -c mymenubar.cpp
You should note that actual parameters for the constructor can be supplied with the class name. For example, setting the "Instantiate as" string to mymenubar_c ("Hello World") will cause WorkShop Visual to generate:
menubar = new mymenubar_c ( "Hello World" );
Creating a definition freezes the widgets within it. Their resource panels are disabled and you cannot add widgets or change widget names. You can edit the widgets that make up a definition only by temporarily removing the definition. This should be done with caution to avoid conflicts with designs that use the definition. For details, see the Modifying a Definition section on page 286.
Note - You must save the design containing the definition before adding it to the palette. WorkShop Visual uses the saved design file each time the definition is used. Although you can have multiple definitions in a single design file, it is easier to keep track if each file contains only one definition.
9.7 Adding a Definition to the Palette
This section explains how to add the new definition to the widget palette.
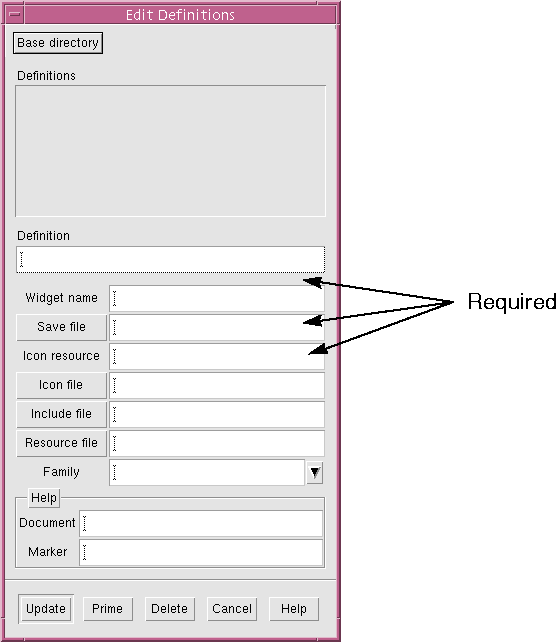
The icon is optional. If you do not specify an icon, WorkShop Visual uses the name of the root widget as a label in a PushButton on the widget palette. If you specify an icon file and the icon file does not exist, the WorkShop Visual icon of the widget at the root of the definition is displayed on the palette,
You can use the WorkShop Visual pixmap editor to design an icon for your definition. It should use an area of color "none" which is used to show the selection in the widget hierarchy. See the Using the Pixmap Editor section on page 174 for details on the pixmap editor and the Palette Icons section on page 617 for details on creating new widget palette icons.
Note that you can also specify the icon via the WorkShop Visual resource file. To do this, specify the name of the WorkShop Visual resource in the "Icon resource" field and set that resource to a file name in the WorkShop Visual resource file.
Use the steps in this section to generate only the code for the definition, i.e. without the Shell or other widgets and without a main program.
To mark the Shell widget so that no code is generated for it:
You must also suppress generation of the main program:
This completes the process needed to create a definition and the code for the corresponding class. It can now be used in an application. The normal way to make the implementation available for reuse is as a library:
make menubar.o
make menubarS.o
make mymenubar.o
ar r libmenu.a *.o
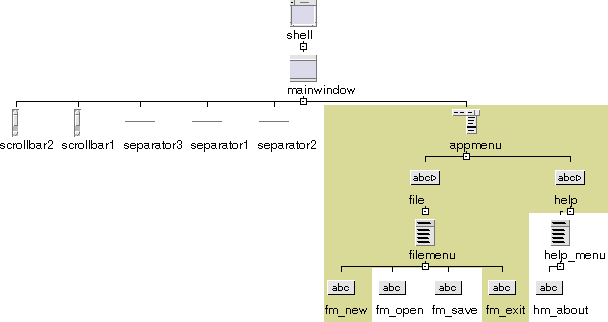
Use the following steps to build a new design using the menubar definition.
In our example, all components of the definition are protected except for the help button. This means only the help button's label can be changed. Similarly, it is possible to add extra widgets under the help button but not under the filemenu menu.
Note - This section is specific to C++ code.
"Generate" toggle.
...
#include <iostream.h>
void
appmenu_c::OnExit (Widget w, XtPointer xt_call_data)
{
if (modified)
XBell(XtDisplay(w), 100);
else
exit(0);
}
void
appmenu_c::OnSave (Widget, XtPointer xt_call_data)
{
cout << "Saving..." << endl;
modified = FALSE;
}
void
appmenu_c::OnOpen (Widget, XtPointer xt_call_data)
{
cout << "Opening..." << endl;
modified = TRUE;
}
The functionality of the application's menubar is now:
MOTIFLIBS = -lXpm -lXm -lXt -lX11 -lmenu
CFLAGS=-I. ${XINCLUDES} -I${XPMDIR} -I../libmenu \
-L../libmenu
So far in this example, all resources have been hard-coded. Use the following steps to regenerate the menubar definition with string resources in a resource file:
Note - You can use the Edit Definition dialog to specify a resource file at any time. The original menubar.xd design does not have to be loaded to perform this step.
! Generated by WorkShop Visual
#include "../libmenu/menubar.res"Xlib interprets this #include directive as giving a pathname relative to the directory containing the application resource file. For details, see the Xlib documentation.
setenv XENVIRONMENT app.res
XENVIRONMENT=app.res; export XENVIRONMENT
Note - There are other ways to get X to recognize your X resource file. To find out what they are, you will need to look them up in a book about the X Window System. See Appendix D, "Further Reading" for the names of some books you may wish to try.